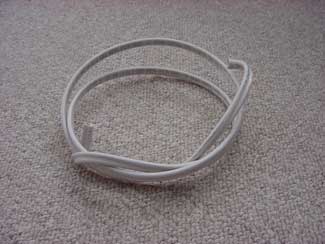
I had some time last night, so I decided to make the actual double biquad part of the antenna. As I said in a recent posting, I used the ground wire from standard household electrical wiring. I used a permanent marker (the kind used to write on recordable cds) to mark out the location of the various bends. According the what I found online, each side of the "diamonds" should be as close to 30.5mm as possible.
At first, I tried using two pairs of pliers to make the bends as sharp as possible, but that didn't work very well. I then switched to using a vise: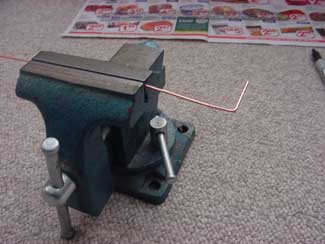

That worked much better. After a bit, I had something like this: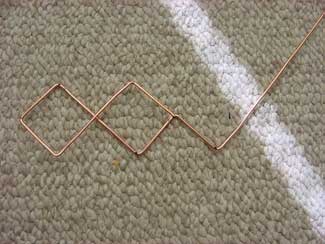
It took some effort, but I had it completed in about a half an hour. Now, I needed something to attach it to. I took the bit of 3/4" copper piping I got for free from a local hardware store and soldered it to my copper reflector plate. I also used a dremel tool to remove a few millimetres from one edge, so that the antenna would not touch it when it came up from the pipe. The result looked like this. Note the excess solder. I don't do this sort of thing often enough.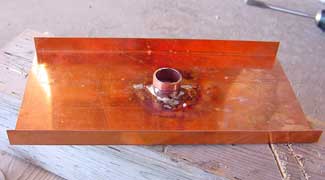
I then soldered a center post to the n-connector (which protruded through the center of the pipe), and tried to solder it to the finished double biquad. What a serious pain that turned out to be. After some thought, it occurred to me that I probably should have made the center post of the biquad part of the double biquad itself -- i.e., why snip it off when I could have simply bent it 90 degrees straight down. Also, I snipped the two ends that should have been soldered to the pipe a bit short, and soldering them to the copper piping turned out to be rather problematic.
I plan on trying this again. This time, I'll make the center post and the double biquad out of a single piece of copper, and leave the two "tails" that have to be connected to the pipe a bit longer than they need to be. I'll use the dremel to create two small grooves in the top of the pipe, lay the two tail ends in those grooves, and put a drop of solder on each. That should make things simpler.
Wednesday, October 04, 2006
Making the double biquad
Sunday, October 01, 2006
Biquad Wifi - making progress
I've come much closer to getting the antenna ready for trial. First, I've acquired a dish. This set me back the staggering sum of $10.00 + shipping from eBay. Just to be safe, I picked up one for nothing from a yard sale, just moments before it closed, as well. The first (pictured below) is a Dish Network model; the second is an elliptical model. I'll try both, and go with the one that has the stronger signal.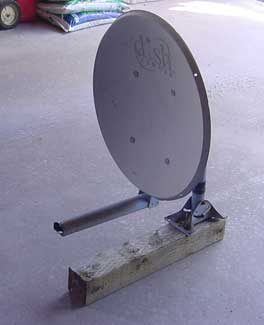
Next, I picked up some 15mm tall 3/4" copper piping from a local hardware store. They actually didn't even charge me for these, which I thought was very kind of them.
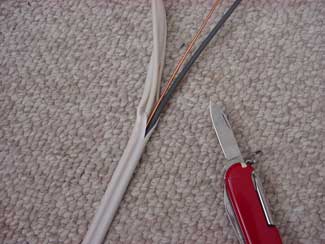
I picked up a few feet of standard household wiring out of the mess in my "don't throw this stuff away 'cause you might need it someday" box in my basement. Used my trusty pocket knife to open this up and extract the ground wire. That way, I don't have to strip the insulation off of the wire.
Thursday, September 28, 2006
The Adventure Begins
So I've started getting together the things I'll need to build my biquad wifi antenna. After some scrounging and a few trips to the web, I have acquired the first two bits of equipment I need to start: copper, and an n-connector. They're not much to look at yet, but here they are: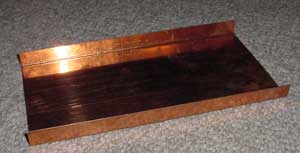
The copper was free -- scrap donated from a local sheet metal shop, and bent into shape very carefully using a couple of bits of lumber. It was fairly trivial.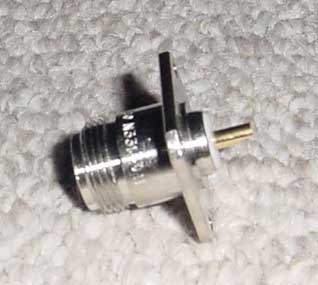
The n-connector set me back slightly under six dollars. Next, I'll see if I can scrounge some copper wiring somewhere, and bend it into the appropriate shape.
