 Someone was asking for photos of the Wifi antenna I built late last year. Apparently the instructions on how the "tupperware" part was used were a bit unclear. I hope a photograph is more helpful.
Showing posts with label antenna. Show all posts
Showing posts with label antenna. Show all posts
Sunday, August 05, 2007
Photos of Wifi Antenna


Thursday, November 16, 2006
No go on the cheese grater
After some careful consideration, I've decided to give the slotted wave guide antenna a miss. I only have 10 fingers, and I'm particularly attached to them. I spoke with a friend who does metal work, and asked him if he thought I could do it... and I think he's still laughing.
Oh well...
Sunday, November 12, 2006
Slotted Waveguide Antenna for 802.11x
This looks interesting... This is a slotted waveguide antenna, which is an alternative to the double-biquad on a satellite dish I put together last month. According to Trevor Marshall's site, this is a rather good design for Wifi network reception. I wonder how hard it would be to make one of these...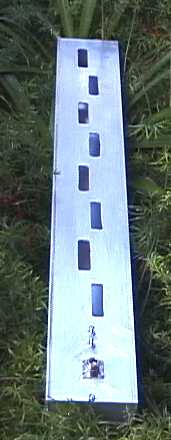
Thursday, November 09, 2006
Antenna Update
My double biquad antenna got a real test last night. We had seriously heavy rainfall, and I am told that water absorbs radio frequency in the 2.4 GHz range (the range used by WiFi). I am pleased to report that it worked flawlessly throughout the entire storm.
Monday, October 23, 2006
Success!
This past weekend I finally found the time to assemble everything and give the dish/double biquad antenna a try, and it worked surprisingly well.
Here's how it went: first, I downloaded a copy of dd-wrt from http://www.dd-wrt.com, and used it to replace the built in OS on my Linksys WRT54G wireless router. It turned out to be a simple enough process, and took less than 30 minutes. By the way, it's amazing the additional functionality this replacement router OS offers -- even if you are not interested in building your own antenna, you should give this a look. It's a serious improvement.
Next, I removed one of the antennas from the router, and connected the router directly to the double biquad using a pigtail cable. I was preparing to hook the double biquad to a dish when I noticed that the router was already reporting more than a dozen available access points -- even without the dish!
This was phenomenal.
I browsed through the available access points to discover that the free wireless network I wanted to connect to was already showing up as available -- and this from inside my house, at my kitchen table. I Clicked on "Join" from within the dd-wrt admin tool, and lo and behold, I was suddenly connected to the internet. Admittedly, this was only a 1 meg connection, but I figured that would improve when I mounted the antenna to the dish, and put the dish on the roof. I made a note of the MAC address of the machine I had connected to so I could figure out just how far away the access point was.
Next, I mounted the double biquad onto the satellite dish. I decided to try the StarChoice dish first, as it was the largest, and I figured it would collect the strongest signal. Mounting was simple enough. I simply tore apart the LNB and then used a power drill and a wood screw to mount it to the plastic housing. That was simple. After I finished, it occurred to me that I should probably have taken into account the fact that I live in Canada, and we don't have the mildest of winters. So, it was off to the dollar store to see if I could find a microwave safe, watertight plastic container to cover the antenna. This turned out to be simple as well. Armed with a Xacto knife and a tube of silicone sealant, I proceeded to mount the assembly a second time, this time in a waterproof container.
An hour later I was up on the roof, and trying to point the dish where I knew there to be an access point or two.
It took some experimentation, but I managed to get a stable, relatively fast 4 meg connection to the wireless network in town.
Ah, the sweet smell of success.... and money saved.
Wednesday, October 04, 2006
Making the double biquad
I had some time last night, so I decided to make the actual double biquad part of the antenna. As I said in a recent posting, I used the ground wire from standard household electrical wiring. I used a permanent marker (the kind used to write on recordable cds) to mark out the location of the various bends. According the what I found online, each side of the "diamonds" should be as close to 30.5mm as possible.
At first, I tried using two pairs of pliers to make the bends as sharp as possible, but that didn't work very well. I then switched to using a vise: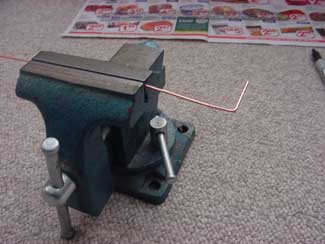

That worked much better. After a bit, I had something like this: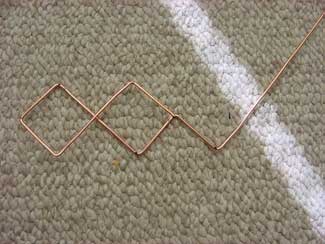
It took some effort, but I had it completed in about a half an hour. Now, I needed something to attach it to. I took the bit of 3/4" copper piping I got for free from a local hardware store and soldered it to my copper reflector plate. I also used a dremel tool to remove a few millimetres from one edge, so that the antenna would not touch it when it came up from the pipe. The result looked like this. Note the excess solder. I don't do this sort of thing often enough.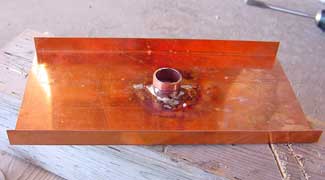
I then soldered a center post to the n-connector (which protruded through the center of the pipe), and tried to solder it to the finished double biquad. What a serious pain that turned out to be. After some thought, it occurred to me that I probably should have made the center post of the biquad part of the double biquad itself -- i.e., why snip it off when I could have simply bent it 90 degrees straight down. Also, I snipped the two ends that should have been soldered to the pipe a bit short, and soldering them to the copper piping turned out to be rather problematic.
I plan on trying this again. This time, I'll make the center post and the double biquad out of a single piece of copper, and leave the two "tails" that have to be connected to the pipe a bit longer than they need to be. I'll use the dremel to create two small grooves in the top of the pipe, lay the two tail ends in those grooves, and put a drop of solder on each. That should make things simpler.
Sunday, October 01, 2006
Biquad Wifi - making progress
I've come much closer to getting the antenna ready for trial. First, I've acquired a dish. This set me back the staggering sum of $10.00 + shipping from eBay. Just to be safe, I picked up one for nothing from a yard sale, just moments before it closed, as well. The first (pictured below) is a Dish Network model; the second is an elliptical model. I'll try both, and go with the one that has the stronger signal.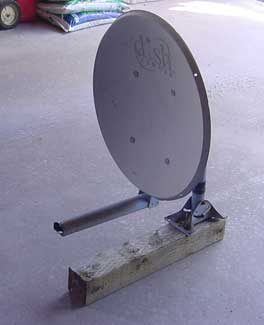
Next, I picked up some 15mm tall 3/4" copper piping from a local hardware store. They actually didn't even charge me for these, which I thought was very kind of them.
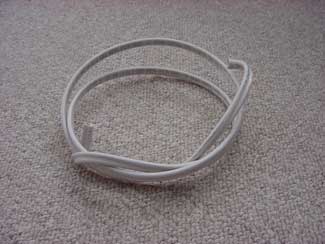
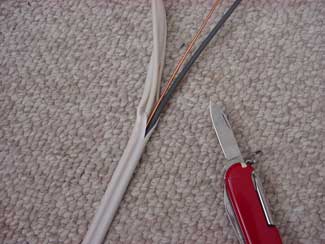
I picked up a few feet of standard household wiring out of the mess in my "don't throw this stuff away 'cause you might need it someday" box in my basement. Used my trusty pocket knife to open this up and extract the ground wire. That way, I don't have to strip the insulation off of the wire.
Thursday, September 28, 2006
The Adventure Begins
So I've started getting together the things I'll need to build my biquad wifi antenna. After some scrounging and a few trips to the web, I have acquired the first two bits of equipment I need to start: copper, and an n-connector. They're not much to look at yet, but here they are: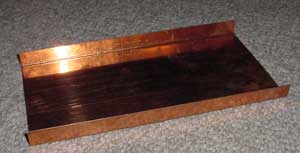
The copper was free -- scrap donated from a local sheet metal shop, and bent into shape very carefully using a couple of bits of lumber. It was fairly trivial.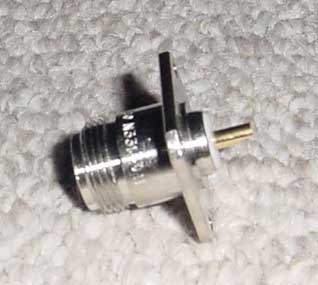
The n-connector set me back slightly under six dollars. Next, I'll see if I can scrounge some copper wiring somewhere, and bend it into the appropriate shape.
Monday, September 25, 2006
Free Wifi Internet for around $20
The city I live near has free WiFi Internet, with very good coverage inside the city limits. Unfortunately, I'm some 15 miles outside those limits, and thus forced to pay for either DSL or cablemodem service. This just doesn't seem right to me. Free Wifi access a scant 15 miles away? There has to be some way to connect.
So, it's off to Google, and lo and behold, I discover this: How to build a biquad wifi antenna, over at Engadget. Given some copper, about $20 worth of gear, and a used satellite dish, you can vastly extend the range of a wifi network.
A bit more reading over here, at Martybugs, suggests that the actual antenna portion can get a higher gain with a few modifications to the design given at Engadget. Checking out Martybugs' sources leads me here, to Trevor Marshall's information. This gives even more detailed information. Hey -- I have a soldering iron and a highly developed sense of adventure, so why not?
I think I'll give it a go. I'll keep you posted.
Subscribe to:
Posts (Atom)

